ASTM A333 Grade 4 Alloy steel pipe
ASTM A333 Grade 4 Alloy steel pipe ASTM A333 Grade 4 Steel Pipe is suitable for -45 ~ -195 ~ C low temperature pressure vessel pipes and seamless steel tubes for low temperature heat exchanger pipes. ASTM A333 Grade 4 Alloy Steel Pipe Quick
ASTM A333 Grade 4 Alloy steel pipe
ASTM A333 Grade 4 Alloy steel pipe
ASTM A333 Grade 4 Steel Pipe is suitable for -45 ~ -195 ~ C low temperature pressure vessel pipes and seamless steel tubes for low temperature heat exchanger pipes.
ASTM A333 Grade 4 Alloy Steel Pipe Quick Details
Company Name: beite steel pipe
Country/Region: China
Product Name:ASTM A333 Grade 4 Alloy Steel Pipe
FOB Price: US $1300-2600 / Ton | 1 Ton/Tons (Min. Order)
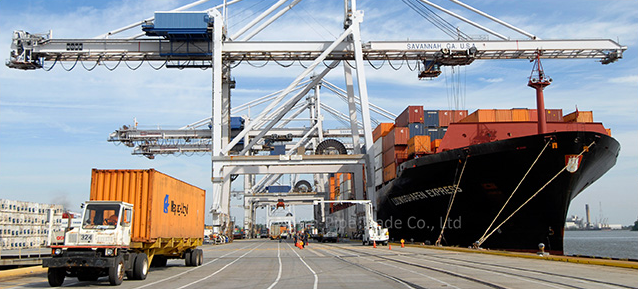
Port of Shipment:Tianjin,China
Payment:L/C or T/T
Delivery: 7-15 days after payment
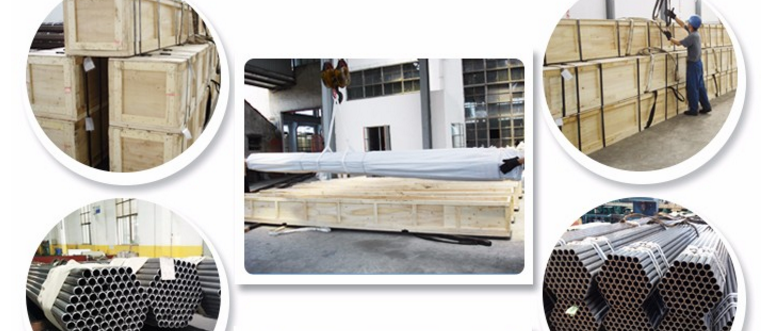
Package:Standard export package,suit for all kinds of transport, or as required.
ASTM A333 Grade 4 Alloy Steel Pipe Dimensional Range & Specification
Outside Diameter:20 – 215mm
Wall thickness:2mm——15mm
Length:6000mm、12000m or specified length as required.
Materials and Manufacture
ASTM A333 Grade 4 steel pipe shall be made by the seamless process.
Heat Treatment:
Normalize by heating to a uniform temperature of not less than 1500°F [815°C] and cool in air or in the cooling chamber of an atmosphere controlled furnace.reheat to a suitable tempering temperature.
For the seamless process only, reheat and control hot working and the temperature of the hot-finishing operation to a finishing temperature range from 1550 to 1750°F [845 to 945°C] and cool in air or in a controlled atmosphere furnace from an initial temperature of not less than 1550°F [845°C].reheat to a suitable tempering temperature.
When specified in the order the test specimens shall be taken from full thickness test pieces which have been stress relieved after having been removed from the heat-treated pipe. The test pieces shall be gradually and uniformly heated to the prescribed temperature, held at that temperature for a period of time in accordance with Table 2, and then furnace cooled at a temperature not exceeding 600°F [315°C].
Table 2 Stress Relieving of Test Pieces
| Metal Temperature |
Minimum Holding Time, h/in. [min/mm] of Thickness |
|
| Grade 4 | ||
| °F | °C | |
| 1150 | 620 | 1 [2.4] |
| 1100 | 600 | 2 [4.7] |
| 1050 | 565 | 3 [7.1] |
Unless otherwise specified, Grade 4 shall be stress relieved at 1150°F [620°C].
Chemical Composition(%) & Physical Properties of ASTM A333 Grade 4 Alloy Steel Pipe
ASTM A333 Grade 4 Alloy Steel Pipe Chemical Composition(%)
| Steel Grade | Chemical Composition(%) | ||||||||||||
| C | Mn | P | S | Si | Ni | Cr | Cu | Al | |||||
| Grade 4 | ≤0.12 | 0.50-1.05 | ≤0.025 | ≤0.025 | 0.18-0.37 | 0.47-0.98 | 0.44-1.01 | 0.40-0.75 | 0.04-0.30 | ||||
Product Analysis
At the request of the purchaser, an analysis of one billet or two samples of flat-rolled stock from each heat or of two pipes from each lot shall be made by the manufacturer. A lot of pipe shall consist of the following:
| NPS Designator | Length of Pipe in Lot |
| Under 2 | 400 or fraction thereof |
| 2 to 6 | 200 or fraction thereof |
| Over 6 | 100 or fraction thereof |
Mechanical Properties
Tensile Requirements
Tensile Requirements
| Grade 4 | ||
| Ksi | Mpa | |
| Tensile strength, min | 60 | 415 |
| Yield strength, min | 35 | 240 |
| Longitudinal | Transverse | |
| Elongation in 2 in.or 50 mm, (or 4D), min, %: | ||
|
Basic minimum elongation for walls 5⁄16 in.[8 mm]and over in thickness,strip tests, and for all small sizes tested in full section |
30 | 16.5 |
| When standard round 2-in.or 50-mm gage length or proportionally smaller size test specimen with the gage length equal to 4D (4 times the diameter) is used | 22 | 12 |
| For strip tests,a deduction for each 1⁄32 in.[0.8 mm] decrease in wall thickness below 5⁄16 in.[8 mm] from the basic minimum elongation of the following percentage | 1.50B | 1.00B |
| Wall Thickness | Elongation in 2 in. or 50 mm, min, %C | ||
| Grade 4 | |||
| in. | mm | Longitudinal | Transverse |
| 5⁄16 (0.312) | 8 | 30 | 16 |
| 9⁄32 (0.281) | 7.2 | 28 | 15 |
| 1⁄4 (0.250) | 6.4 | 27 | 15 |
| 7⁄32 (0.219) | 5.6 | 26 | .... |
| 3⁄16 (0.188) | 4.8 | 24 | .... |
| 5⁄32 (0.156) | 4 | 22 | .... |
| 1⁄8 (0.125) | 3.2 | 21 | .... |
| 3⁄32 (0.094) | 2.4 | 20 | .... |
| 1⁄16 (0.062) | 1.6 | 18 | .... |
B The following table gives the calculated minimum values.
C Calculated elongation requirements shall be rounded to the nearest whole number.
Note:The preceding table gives the computed minimum elongation values for each 1⁄32in. [0.80mm] decrease in wall thickness. Where the wall thickness lies between two values shown above, the minimum elongation value is determined by the following equation:
| Grade | Direction of Test | Equation |
| 4 | Longitudinal | E = 48t + 15.00 [E = 1.87t + 15.00] |
| Transverse | E = 32t + 6.50 [E = 1.25t+ 6.50] | |
|
where: E = elongation in 2 in. or 50 mm, in %, and t = actual thickness of specimen, in. [mm]. |
||
Impact Requirements
For Grades 4 the notched-bar impact properties of each set of three impact specimens, including specimens for the welded joint in welded pipe with wall thicknesses of 0.120 in. [3 mm] and larger,
TABLE 4 Impact Requirements for Grades 4
| Size of Specimen, mm | Minimum Average Notched Bar Impact Value of Each Set of Three SpecimensA | Minimum Notched Bar Impact Value of One Specimen Only of a SetA | ||
| ft·lbf | J | ft·lbf | J | |
| 10 by 10 | 13 | 18 | 10 | 14 |
| 10 by 7.5 | 10 | 14 | 8 | 11 |
| 10 by 6.67 | 9 | 12 | 7 | 9 |
| 10 by 5 | 7 | 9 | 5 | 7 |
| 10 by 3.33 | 5 | 7 | 3 | 4 |
| 10 by 2.5 | 4 | 5 | 3 | 4 |
Lengths
If definite lengths are not required, pipe may be ordered in single random lengths of 16 to 22 ft with 5 % 12 to 16 ft, or in double random lengths with a minimum average of 35 ft and a minimum length of 22 ft with 5 % 16 to 22 ft.
Workmanship, Finish and Appearance
1.The pipe manufacturer shall explore a sufficient num- ber of visual surface imperfections to provide reasonable assurance that they have been properly evaluated with respect to depth.
2.Surface imperfections that penetrate more than 12½ % of the nominal wall thickness or encroach on the minimum wall thickness shall be considered defects.
2.Surface imperfections that penetrate more than 12½ % of the nominal wall thickness or encroach on the minimum wall thickness shall be considered defects.
3.The pipe manufacturer shall remove by grinding the following:
Mechanical marks, abrasions and pits, any of which imperfections are deeper than 1⁄16 in. [1.6 mm], and
Visual imperfections commonly referred to as scabs, seams, laps, tears, or slivers found by exploration
4.When imperfections or defects are removed by grind- ing, a smooth curved surface shall be maintained, and the wall thickness shall not be decreased below that permitted by this specification. The outside diameter at the point of grinding may be reduced by the amount so removed.
5.The finished pipe shall be reasonably straight.
Mechanical Testing
Sampling—For mechanical testing
1.Transverse or Longitudinal Tensile Test and Flattening Test
2..Hydrostatic Test—Each length of pipe shall be sub- jected to the hydrostatic test.
3.Impact Test—One notched bar impact test, consisting of breaking three specimens, shall be made from each heat represented in a heat-treatment load on specimens taken from the finished pipe. This test shall represent only pipe from the same heat and the same heat-treatment load, the wall thick- nesses of which do not exceed by more than 1⁄4 in. [6.3 mm] the wall thicknesses of the pipe from which the test specimens are taken. If heat treatment is performed in continuous or batch- type furnaces controlled within a 50°F [30°C] range and equipped with recording pyrometers so that complete records of heat treatment are available, then one test from each heat in a continuous run only shall be required instead of one test from each heat in each heat-treatment load.
Impact Tests (Welded Pipe)
Impact Test
Except when the size of the finished pipe is insufficient to permit obtaining subsize impact specimens, all material furnished to this specification and marked in accordance with Section 16 shall be tested for impact resistance at the minimum temperature for the respective grades
| Steel Grade | Impact temperature | ||||||||||||
| ℉ | ℃ | ||||||||||||
| Grade 4 | -150 | -100 | |||||||||||
Hydrostatic or Nondestructive Electric Test
Nondestructive Electric Test—Nondestructive electric tests shall be in accordance with Specification A 999/A 999M, with the following addition:
If the test signals were produced by visual imperfec- tions (D), the pipe may be accepted based on visual examination, provided the imperfection is less than 0.004 in. (0.1 mm) or 12½ % of the specified wall thickness(whichever is greater).
D:
Visual Imperfections: Scratches, Surface roughness, Dings, Straightener marks, Cutting chips, Steel die stamps, Stop marks, or Pipe reducer ripple.
Product Marking
Except as modified in 16.1.1, in addition to the marking prescribed in Specification A 999/A 999M, the mark- ing shall include whether hot finished, cold drawn, seamless or welded, the schedule number and the letters “LT” followed by the temperature at which the impact tests were made, except when a lower test temperature is required because of reduced specimen size, in which case, the higher impact test tempera- ture applicable to a full-size specimen should be marked.
ASTM A333 Grade 4 Alloy Steel Pipe Packaging & Delivery

Types of Packaging:
- Bundles (hexagonal)
- Wooden Boxes
- Crates (steel/wooden)
- Special crates for U-Bend tubes with each radius separated
- Our ASTM A333 Grade 4 Alloy Steel Pipe packing can meet any needs of the customers.
Delivery: 7-15 days after payment

Contact:Lucky

Keywords
low; low temperature service; seamless steel pipe; stainless steel pipe; steel pipe; temperature service applications
Contact:Lucky
whatapp: +8615003211561
E-mail:jinxiaolong0221@gmail.com
Product key description, this is a very good product description, detailing our product use, product characteristics


